Hardware Wallets
Hardware wallet support is experimental. Use at your own discretion
Hardware wallet support must be enabled since it's an experimental feature
-
Go to Settings in the lower left toolbar.
-
In the "Extras" section, toggle on "Experimental Features".
-
You can now follow the below steps to set up your HW wallet.
Supported Hardware Wallets
Ledger
Trezor
Add your HW Wallet to Zelcore
- Make sure you are using Zelcore v7.0.0 or greater.
- Enable "Experimental Features" in Settings screen.
- Log into Zelcore & connect your Trezor/Ledger device.
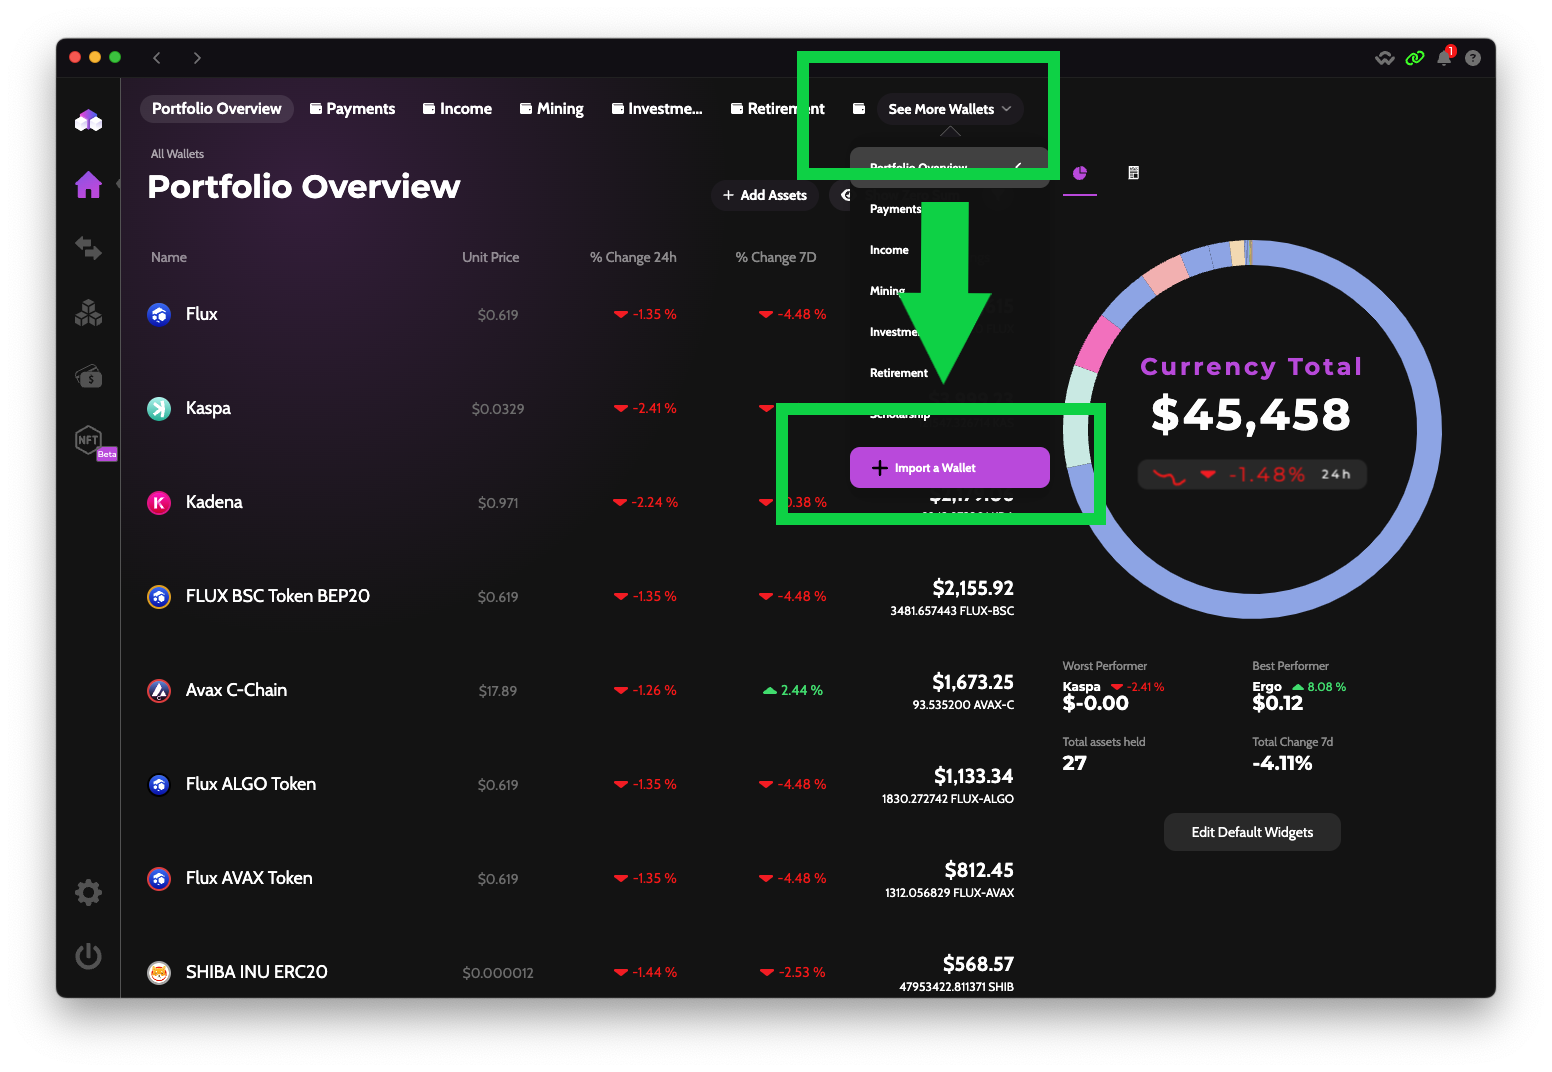
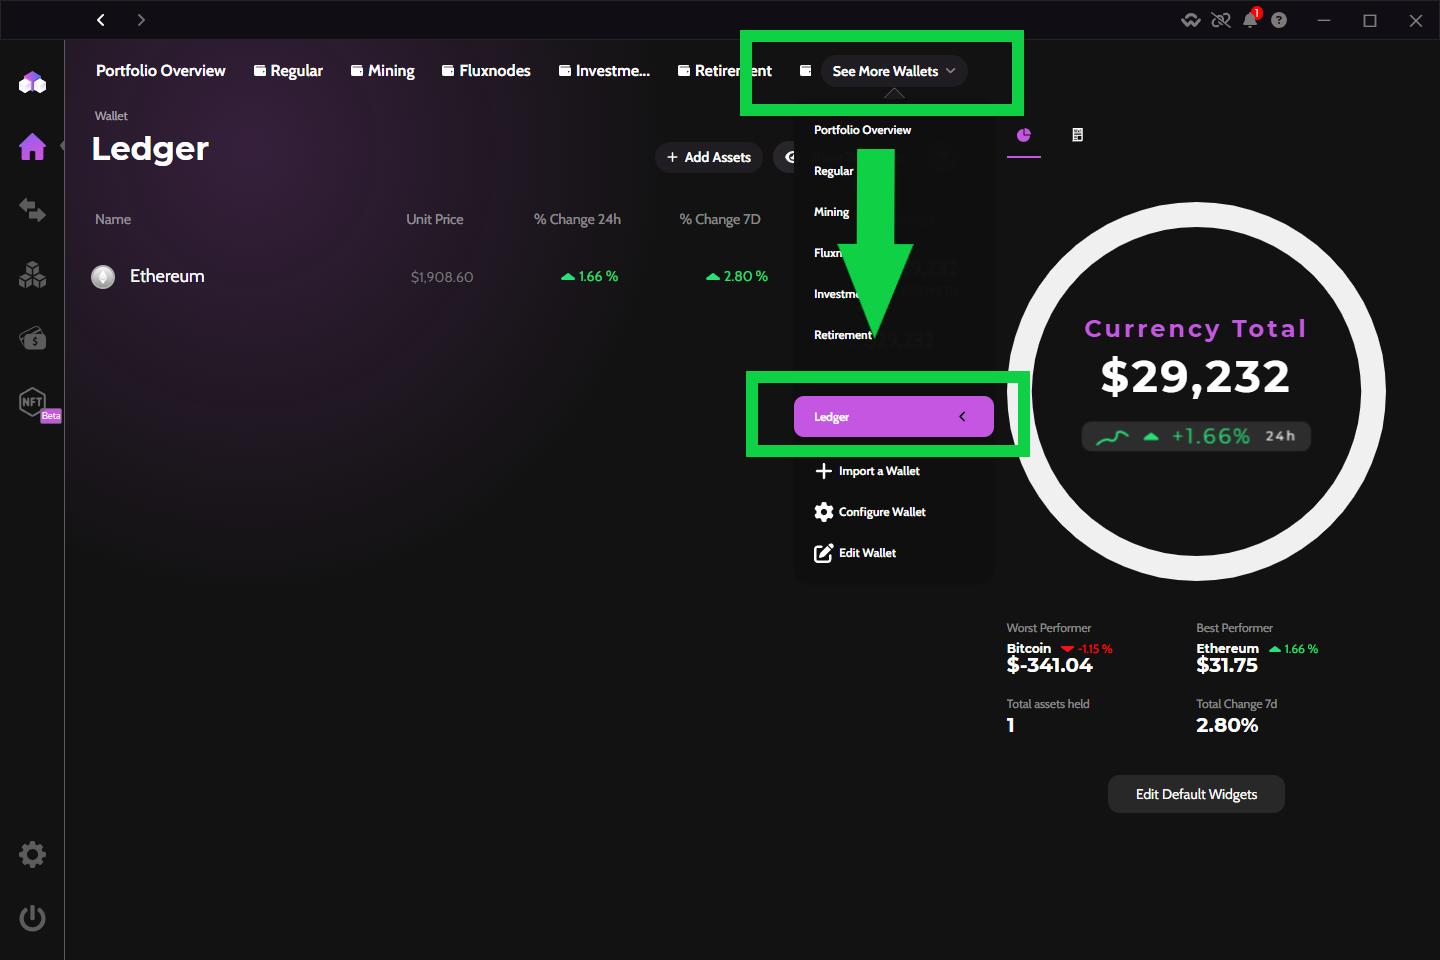
- Tap the "See More Wallets" button in the upper middle of Portfolio Overview. Select "Import a Wallet".
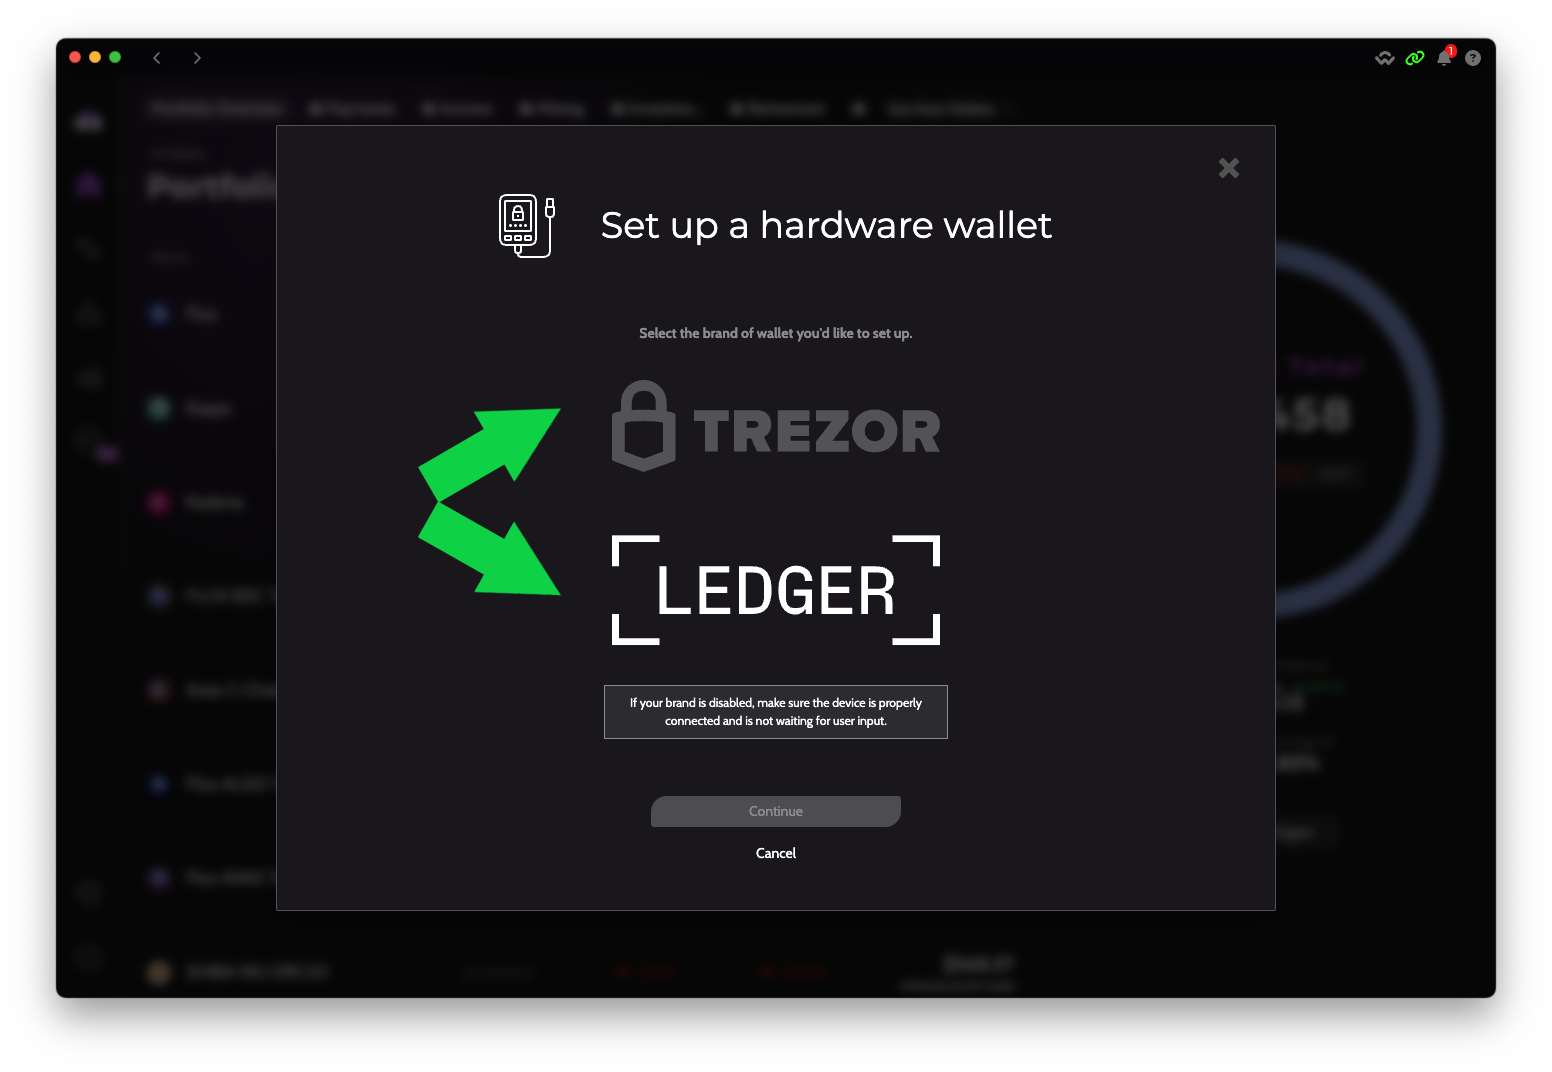
- Select "Hardware Wallet".
- Choose either "Ledger" or "Trezor" for the brand of hardware wallet you are using.
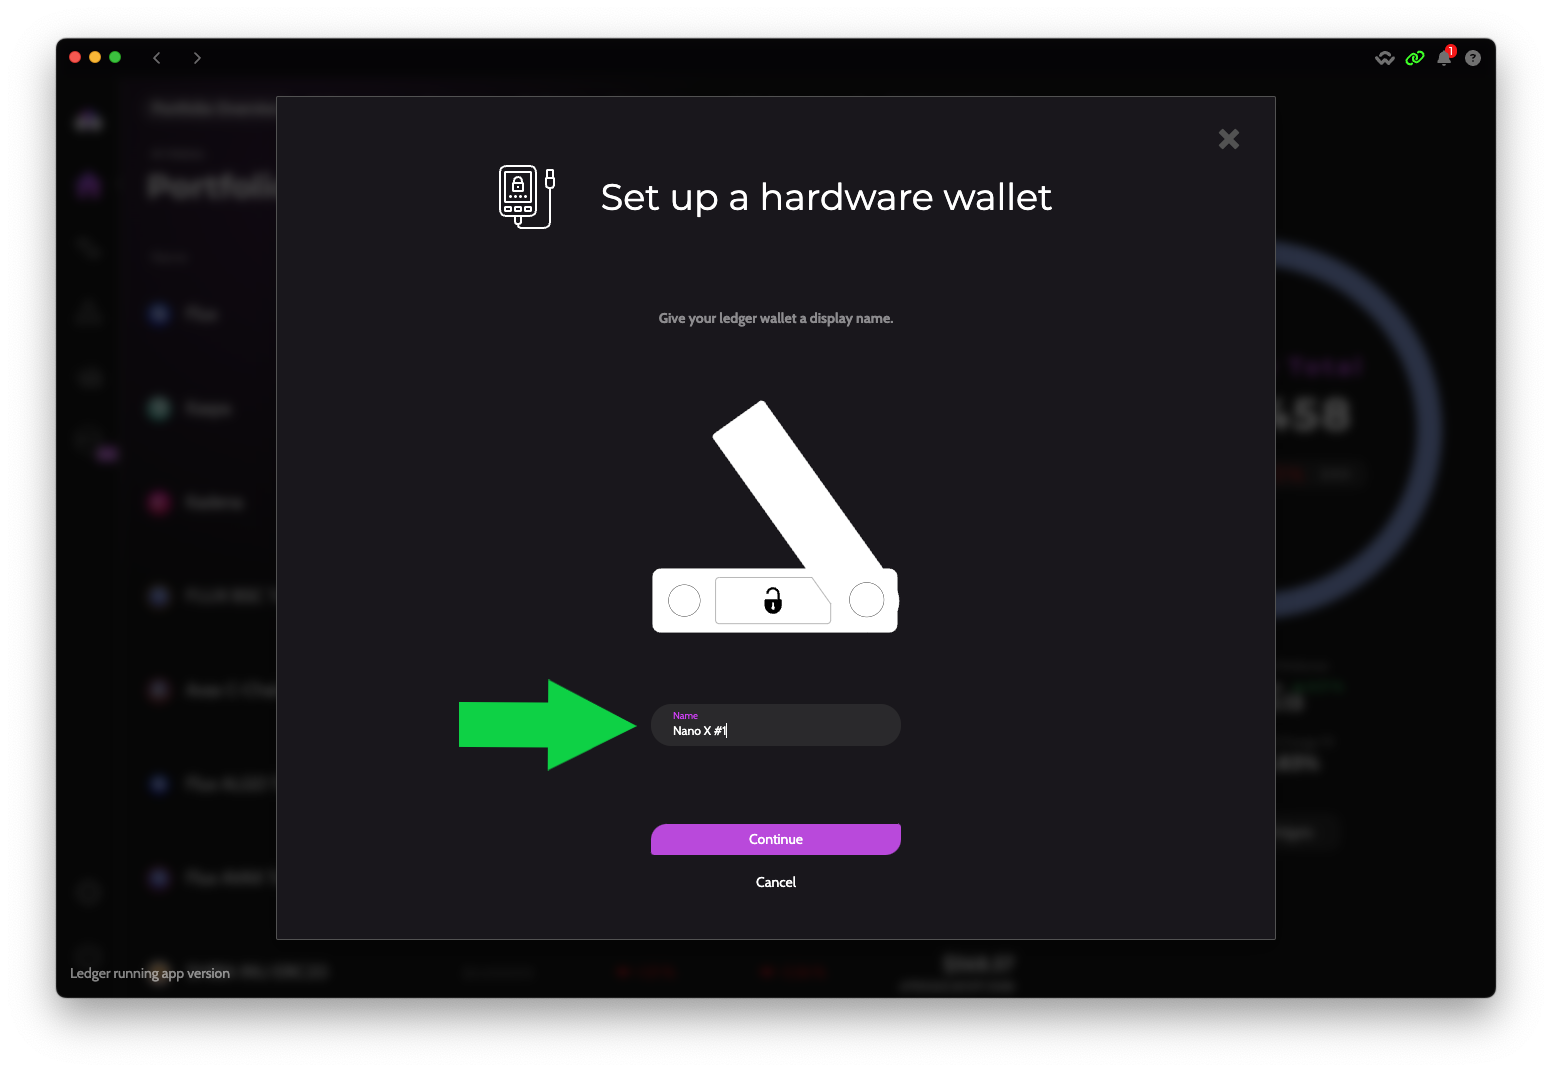
- Type in a name for your imported hardware wallet (e.g. "Ledger").
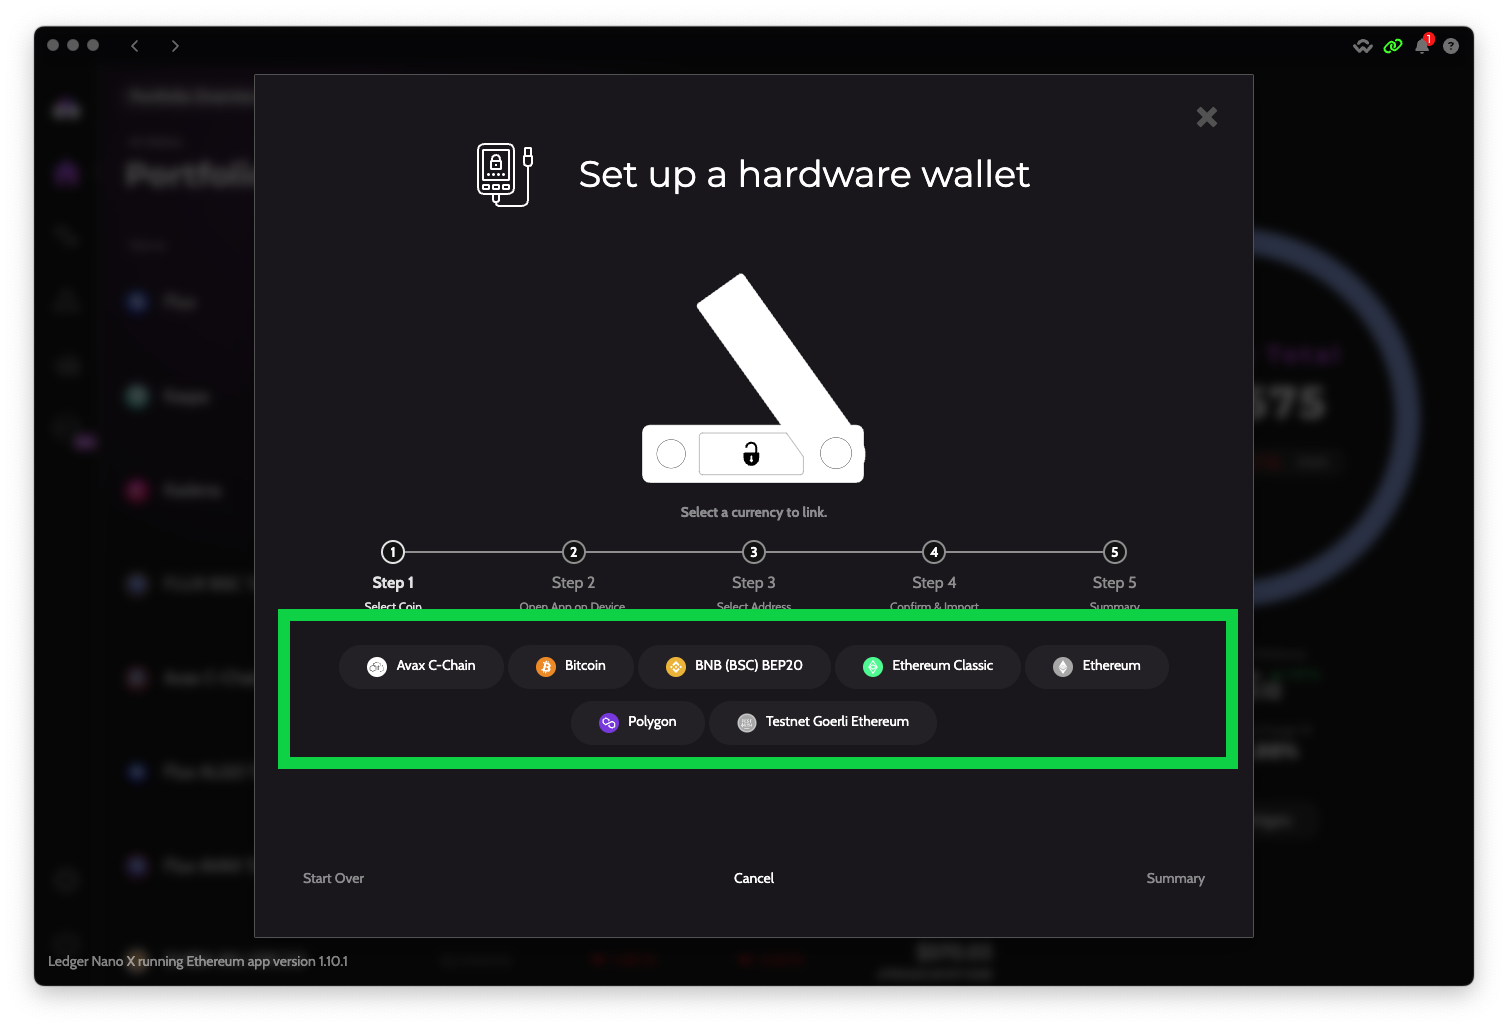
- Select your first asset to add to your imported wallet.
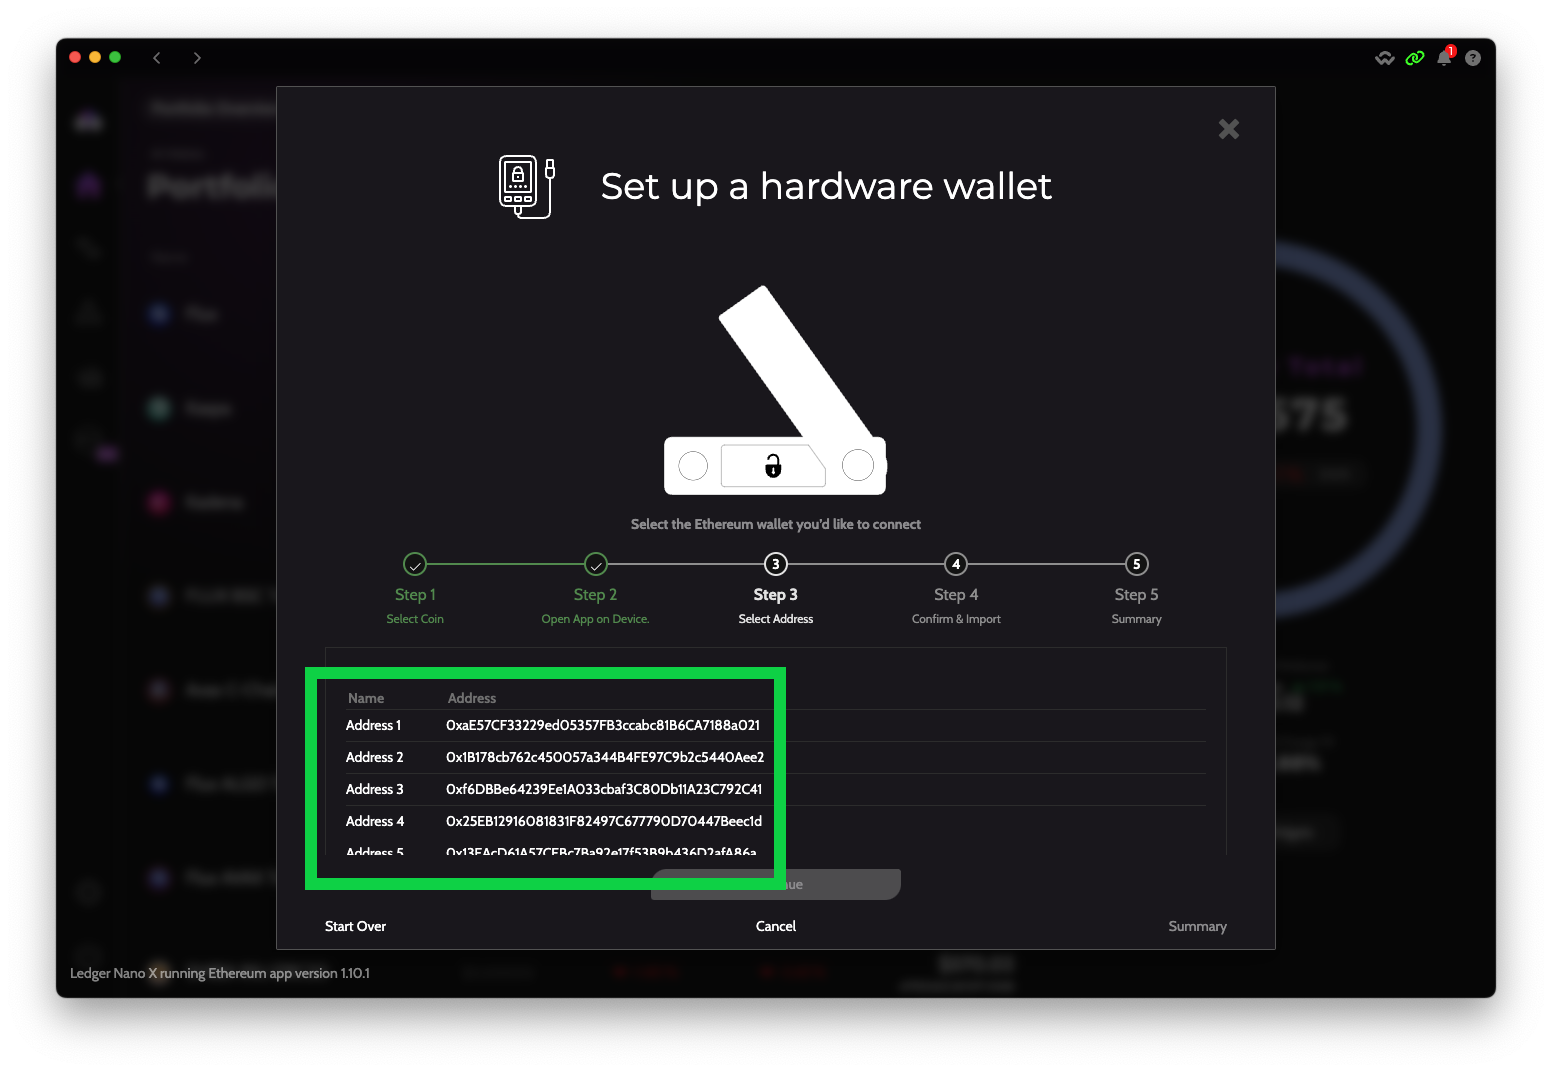
- Give the hardware wallet time to calculate all your addresses. Select which address you wish to import.
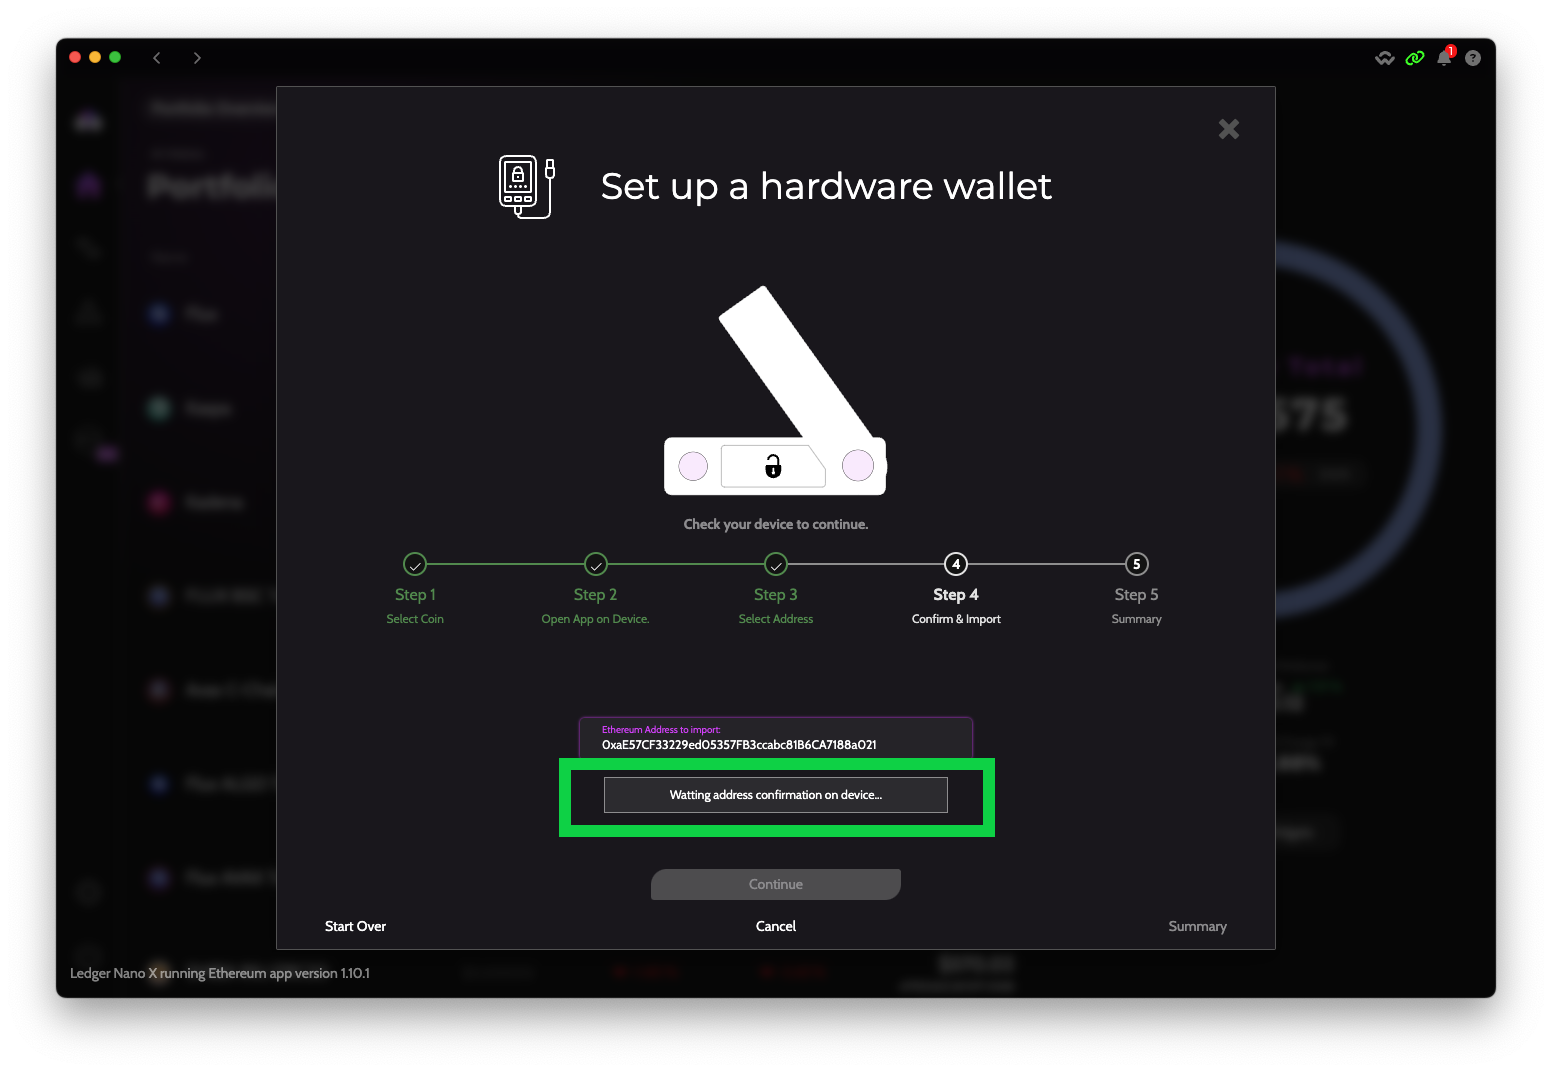
- Confirm on your device that the address displayed in Zelcore matches the one displayed on your hardware wallet.
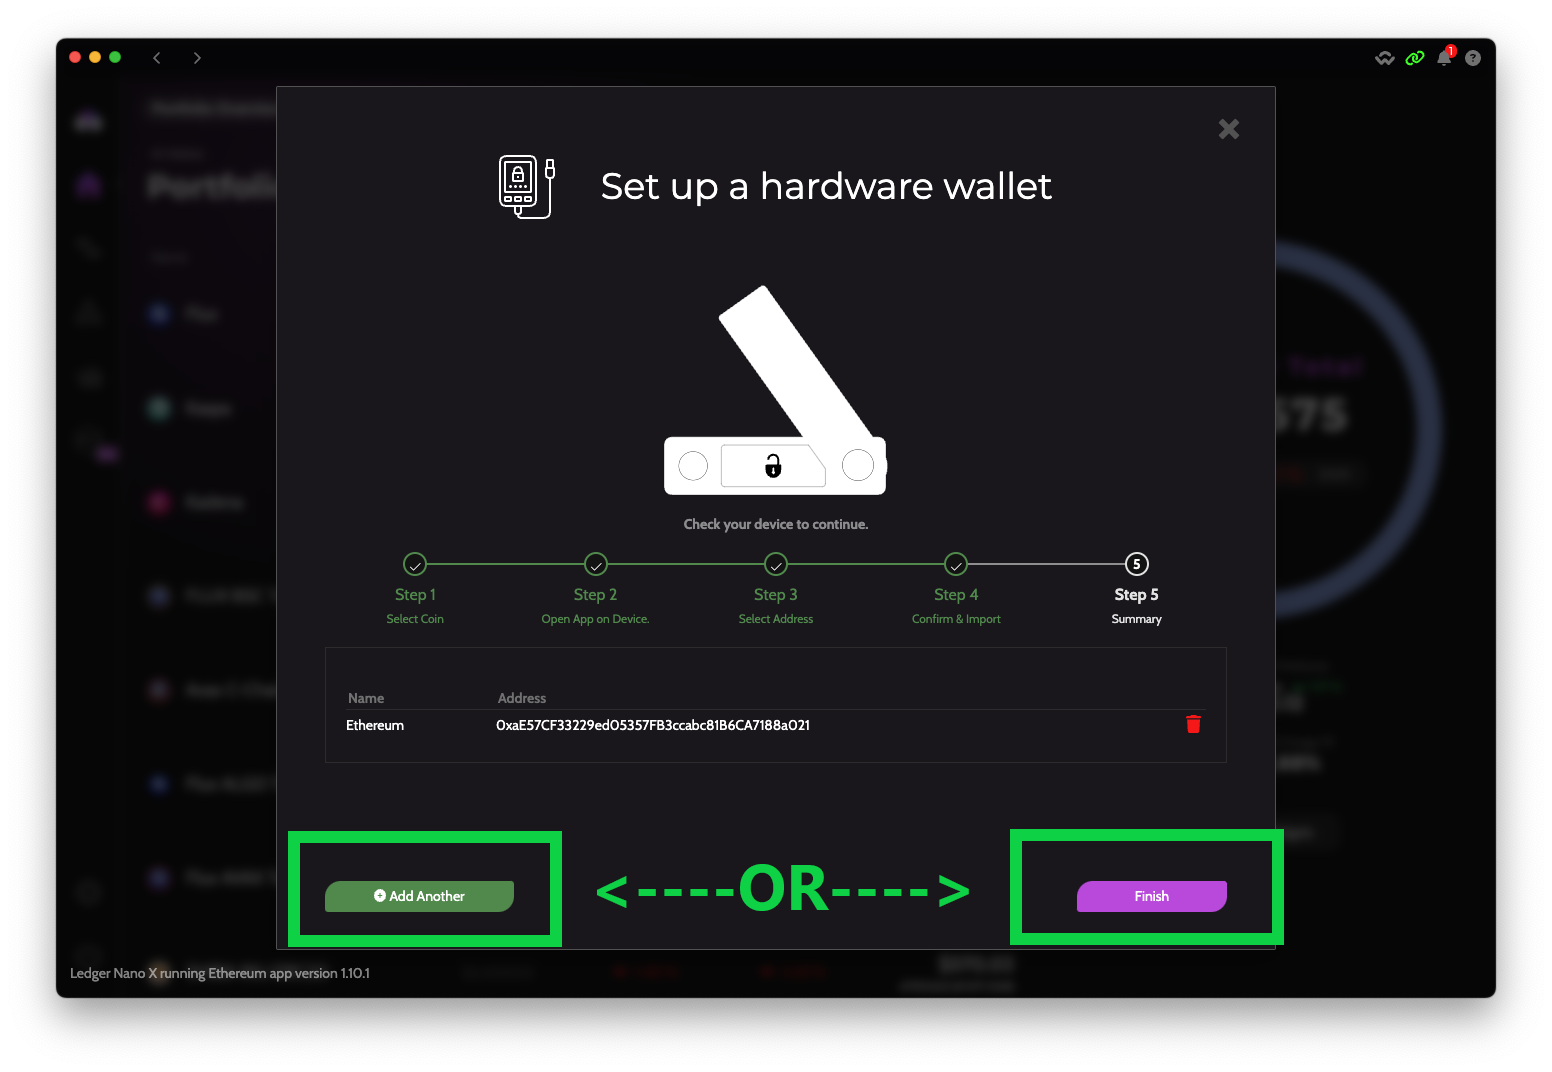
- Either choose to add more assets/addresses from your hardware wallet or skip to Step 11 to complete the import.
- Follow steps 6-8 to add as many assets and addresses as you wish.
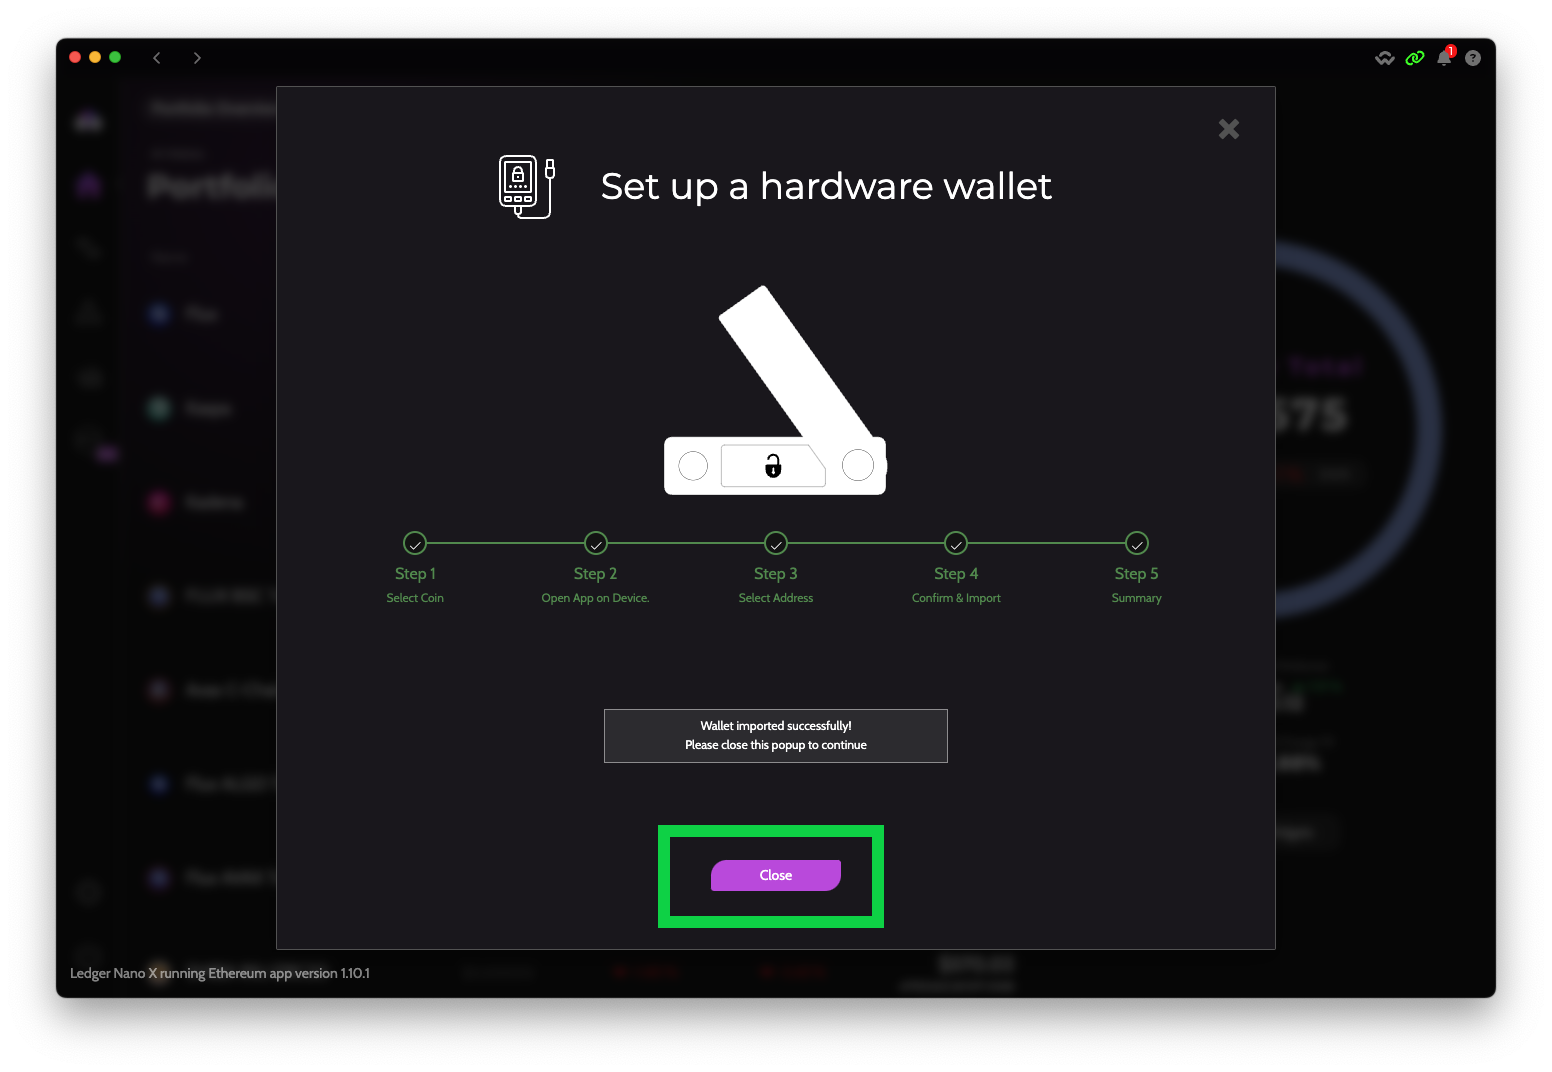
- After finishing all steps on Zelcore, tap the "Close" button to finish the import.
- Navigate to your new Zelcore wallet that imported all your hardware wallet addresses.
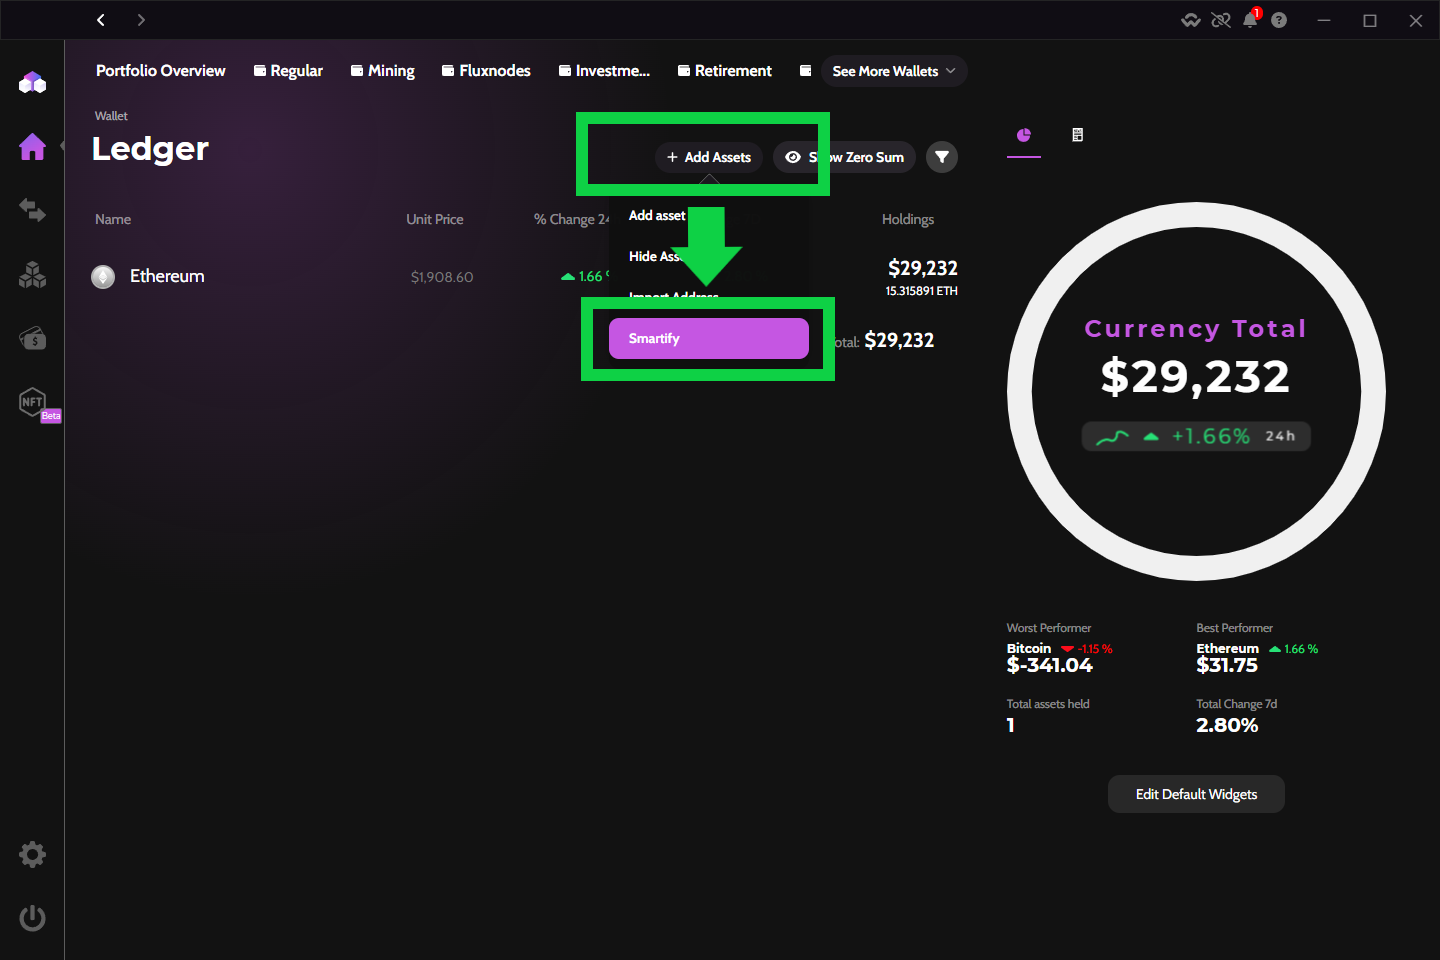
- If your addresses have balances that are not showing up in Zelcore, select the "Smartify" option to force Zelcore to query all address balances now.
Imported Address Not Showing Up?
If you do not see your coin after importing a HW wallet address, select "Show Zero Sum" button. This happens if the address is empty.
Steps in pictures